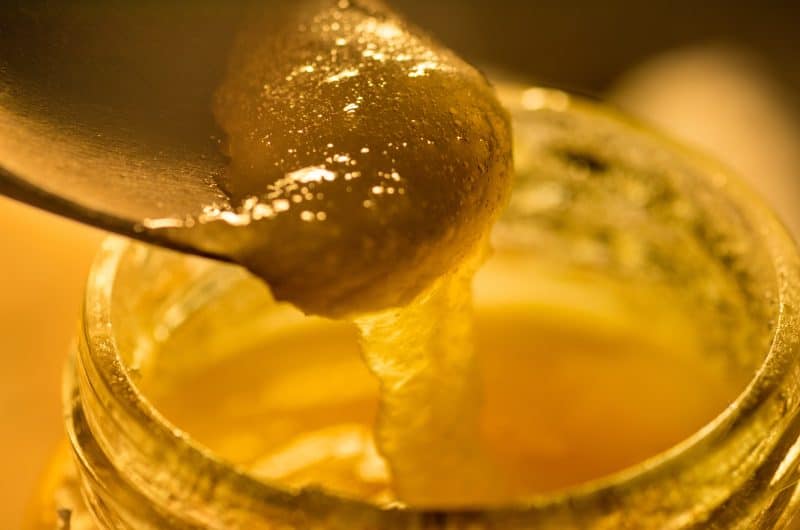
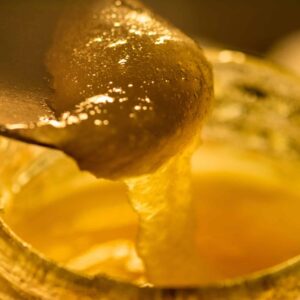
This Southern food is beautiful to look at and even better to eat. The scuppernong jelly recipe may take a bit of dedication to excel at, but it is utterly worth the time.
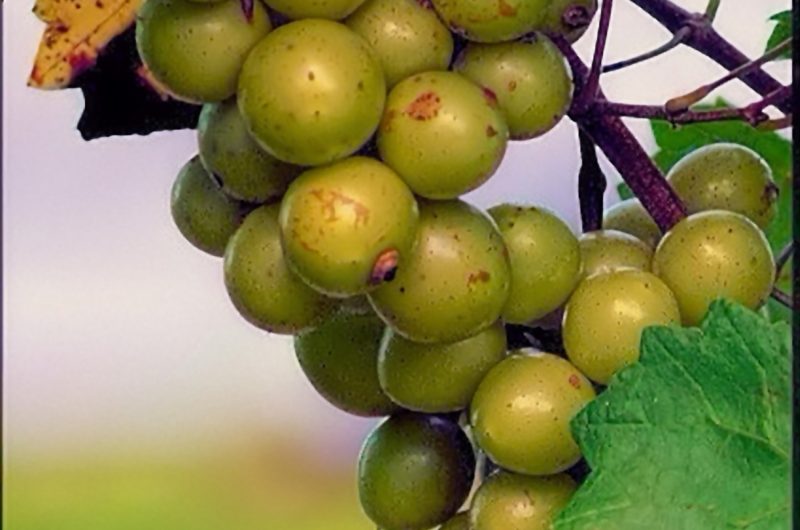
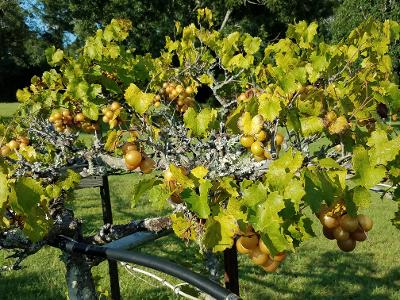
Scuppernongs are a Southern trademark, something that you can only truly experience south of the Mason-Dixon. Some folks may know this fruit as the scuplin. These unique fruits are a type of muscadine, which are a form of grape that is large with definitive skin and seed.
The colors of these grapes range from gold to golden-green, and the fruit is sweet and almost plum-like in taste. They are exceptionally fragrant, which makes them popular for wine. They’re filled with antioxidants and fiber. They are wonderful for lowering cholesterol and blood pressure, as well as beneficial for the heart and skin. They provide potassium, vitamin A, calcium, iron, zinc, and many other vitamins and minerals.
Scuppernongs are known for their use in wine, but also make for a wonderful jelly. Similar to grape jelly, it pairs well with biscuits or with crackers and cheese. Or try it on our apricot muffins.
Tips for Making the Jelly
Choose scuppernongs that have just reached ripeness, and are not over-ripe.
This recipe will make about 6 half-pint jars. This is the standard jelly-jar size.
If you end up with extra juice, add 3/4 cup sugar for every additional 1 cup of juice.
Some people add yellow food coloring to make their jelly brighter. You can add a couple drops if you want, to ensure it achieves a bronze color.
Do I Need to Water-Bathe?
When water bathed, the jelly is shelf-stable for up to 1 year and can be kept in the fridge for 1 month once opened. You’ll need a hot water canner and jars with separate lids and bands.
You’ll also need to ensure your equipment and jars are sterilized and kept sterile throughout the process. Following our instructions carefully will help ensure safe, shelf-stable food.
If you don’t have the right supplies, you can still make this yummy jelly! Just seal your jars or other containers and store them in the freezer for up to 1 year, or in the fridge for up to 1 month.
What Can I Use Scuppernong Jelly For?
This jelly is perfect on any bread or biscuit, but you can take it a step further.
- Make a grilled cheese with scuppernong jelly and brie cheese…Mmm!
- Use the jelly on a charcuterie board to compliment brie or walnuts
- Layer with sponge cake and whipped cream for a trifle
- Add to whole scuppernongs for a pie filling
- Use it as a substitute for plain grape jelly in a peanut butter and jelly sandwich
What Should I Do With the Hulls?
Don’t throw away those grape skins! We have the perfect recipe for you: Our delicious Scuppernong Hull Cake! These two recipes pair together – the 6 pounds of scuppernongs you need for this jelly will produce the right amount of hulls for your cake. If you plan to make the cake, pop the pulp and seeds out of the hulls as part of your first step after washing the grapes. Use the pulp for making the jelly and set aside the hulls for the cake.
Scuppernong Jelly (Without Pectin)
Ingredients
- 6 pounds scuppernong grapes
- 4 1/2 cups sugar
Directions
To Prepare the Juice for the Jelly
- Thoroughly rinse the scuppernongs, remove the stems, and discard any blemished fruit.
- Add the scuppernongs (plus a very small amount of water to prevent scorching) to a large pot, bring to a boil, reduce to simmer, and cook for 20 minutes. Use a potato masher to crush the scuppernongs as they cook.
- Remove from heat and let cool.
- Pour the mixture into a large jelly bag or cheesecloth, that you can suspend over your pot to let the juice strain back into the pot. Allow the mixture to drip at least 6 hours, or overnight. (This amount of scuppernongs should yield at least 6 cups of juice.)
To Make the Scuppernong Jelly
- Bring 6 cups of the scuppernong juice to a rolling boil and stir occasionally.
- Add in the sugar, stirring to dissolve.
- Boil at high heat, reaching 220 degrees Fahrenheit, until jelly thickens. Perform the Spoon Test – Dip a cool metal spoon into the boiling jelly mixture and lift the spoon out of the steam so the mixture drips off the side. As the syrup boils and turns to jelly, the drops will become heavier and will drop off the spoon two at a time. When the two drops form together and “sheet” off the spoon, the jellying point has been reached. (Credit)
- Remove from heat and quickly skim the foam off the top if desired.
- From here, you can ladle your jelly into clean jars and place in them in the fridge or freezer, or move onto the next section to make your jelly shelf-stable.
To Jar The Jelly: Shelf-Stable Process
- While you’re preparing your jelly:
- Sterilize your canning jars by boiling for a full 10 minutes. (At higher elevations, boil 1 additional minute for each additional 1,000 ft. elevation.) Sterilized jars can remain in the hot water until they are ready to be filled.
- Separately wash your lids and bands with warm soapy water, fully rinse, then place in a pot of water, but do not boil. Bring to just under a boil for 10 minutes.
- Fill your canner with enough water so that it will cover the jars by at least 1 inch. Preheat to 180F so the jars don’t crack.
- Ladle the hot jelly into the sterilized jars, leaving a 1/4 inch space at the top of the jar (this is the headspace). Aim for this exact amount of headspace to ensure your lids will properly seal after the water bath.
- Wipe the jar rims with a clean damp towel to clean off any jelly residue. This will help ensure the lids seal.
- Remove lids from the hot water with a magnet tool (to keep sterile), place on jars, and screw on the bands. The bands should be finger-tight (in other words — tight, but don’t over-tighten).
- Using tongs, place the jelly-filled jars on the rack in your water canner. If they’re not submerged, add water. Cover the canner with its lid.
- Bring the heat to high and process the jars in the water canner at a full boil for 5 minutes. (See altitude chart below. If you’re located at over 1000 feet elevation, you’ll need a longer processing time.)
- Turn off heat and let sit for 5 minutes.
- Using tongs, transfer the jars to a towel to cool for 12-24 hours.
- Once cool, remove the outer bands and visually inspect the seal for leakage. If the jar sealed properly, the metal lid will be slightly concave. (If you see leakage or a poor seal, just store that one in your fridge or freezer.)
- Store the sealed jars in cool, dry, dark place.
Processing Time and Altitude
| Altitude in Feet | Minutes to Add to Canner Processing Time |
|---|---|
| 0-1000 | 0 |
| 1001-3000 | 5 |
| 3001-6000 | 10 |
| 6001-8000 | 15 |
| 8001-10000 | 20 |
We hope you’ll enjoy our Scuppernong Jelly recipe!
Scuppernong Jelly
Equipment
- large pot
- cheesecloth
- mason jars
- water bath canner (for shelf-stable preparation)
- tongs (for shelf-stable preparation)
Ingredients
- 6 pounds scuppernongs
- 4.5 cups sugar
Instructions
To Prepare the Juice for the Jelly
- Thoroughly rinse the scuppernongs, remove the stems, and discard any blemished fruit.
- Add the scuppernongs (plus a very small amount of water to prevent scorching) to a large pot, bring to a boil, reduce to simmer, and cook for 20 minutes. Use a potato masher to crush the scuppernongs as they cook.
- Remove from heat and let cool.
- Pour the mixture into a large jelly bag or cheesecloth, that you can suspend over your pot to let the juice strain back into the pot. Allow the mixture to drip at least 6 hours, or overnight.
To Make the Jelly
- Bring 6 cups of the scuppernong juice to a rolling boil and stir occasionally.
- Add in the sugar, stirring to dissolve.
- Boil at high heat, reaching 220 degrees Fahrenheit, until jelly thickens.
- Remove from heat and quickly skim the foam off the top if desired.
- Ladle your jelly into clean jars and place in them in the fridge or freezer. OR, review the article section above called "To Jar The Jelly: Shelf-Stable Process" to make your jelly shelf-stable.

My juice is very cloudy. Will it clear when I make it into jelly?
Hi Donna. Cloudy juice can occur if the fruit is boiled a little too hard or if all the fruit wasn’t quite ripe enough. You can try sending the juice through the cheesecloth one more time when this happens. And make sure not to squeeze it through the cheesecloth; that will definitely make it cloudy.
As I’m allowing the juice to drain, does it need to be refrigerated, or is it Ok to leave it on the counter?
Hi Angie. Yes, the draining process needs to take place at room temperature.
why would it not jelly up. and stay liquid
Hi James. If you’re sure the measurements of juice vs. sugar was correct, ensure that your boiling temperature gets all the way to 220F to get it thicken.
I stumbled upon this recipe after looking up some things to do with a bunch of scuppernong grapes that came in my CSA basket. I’m not usually a big fan of them and they go to waste. I made it with, no offense, the lowest of expectations. And I was totally surprised when my husband and I loved it! If anyone is on the fence about making this, don’t be. It had total apple pie vibes, and I’ll absolutely make it again. Thanks for sharing your family recipe!
Sarah, thank you for taking the time to comment. We’re so happy you enjoyed the recipe !